

Available on the Enterprise plan. Contact sales to learn more.
Share a project
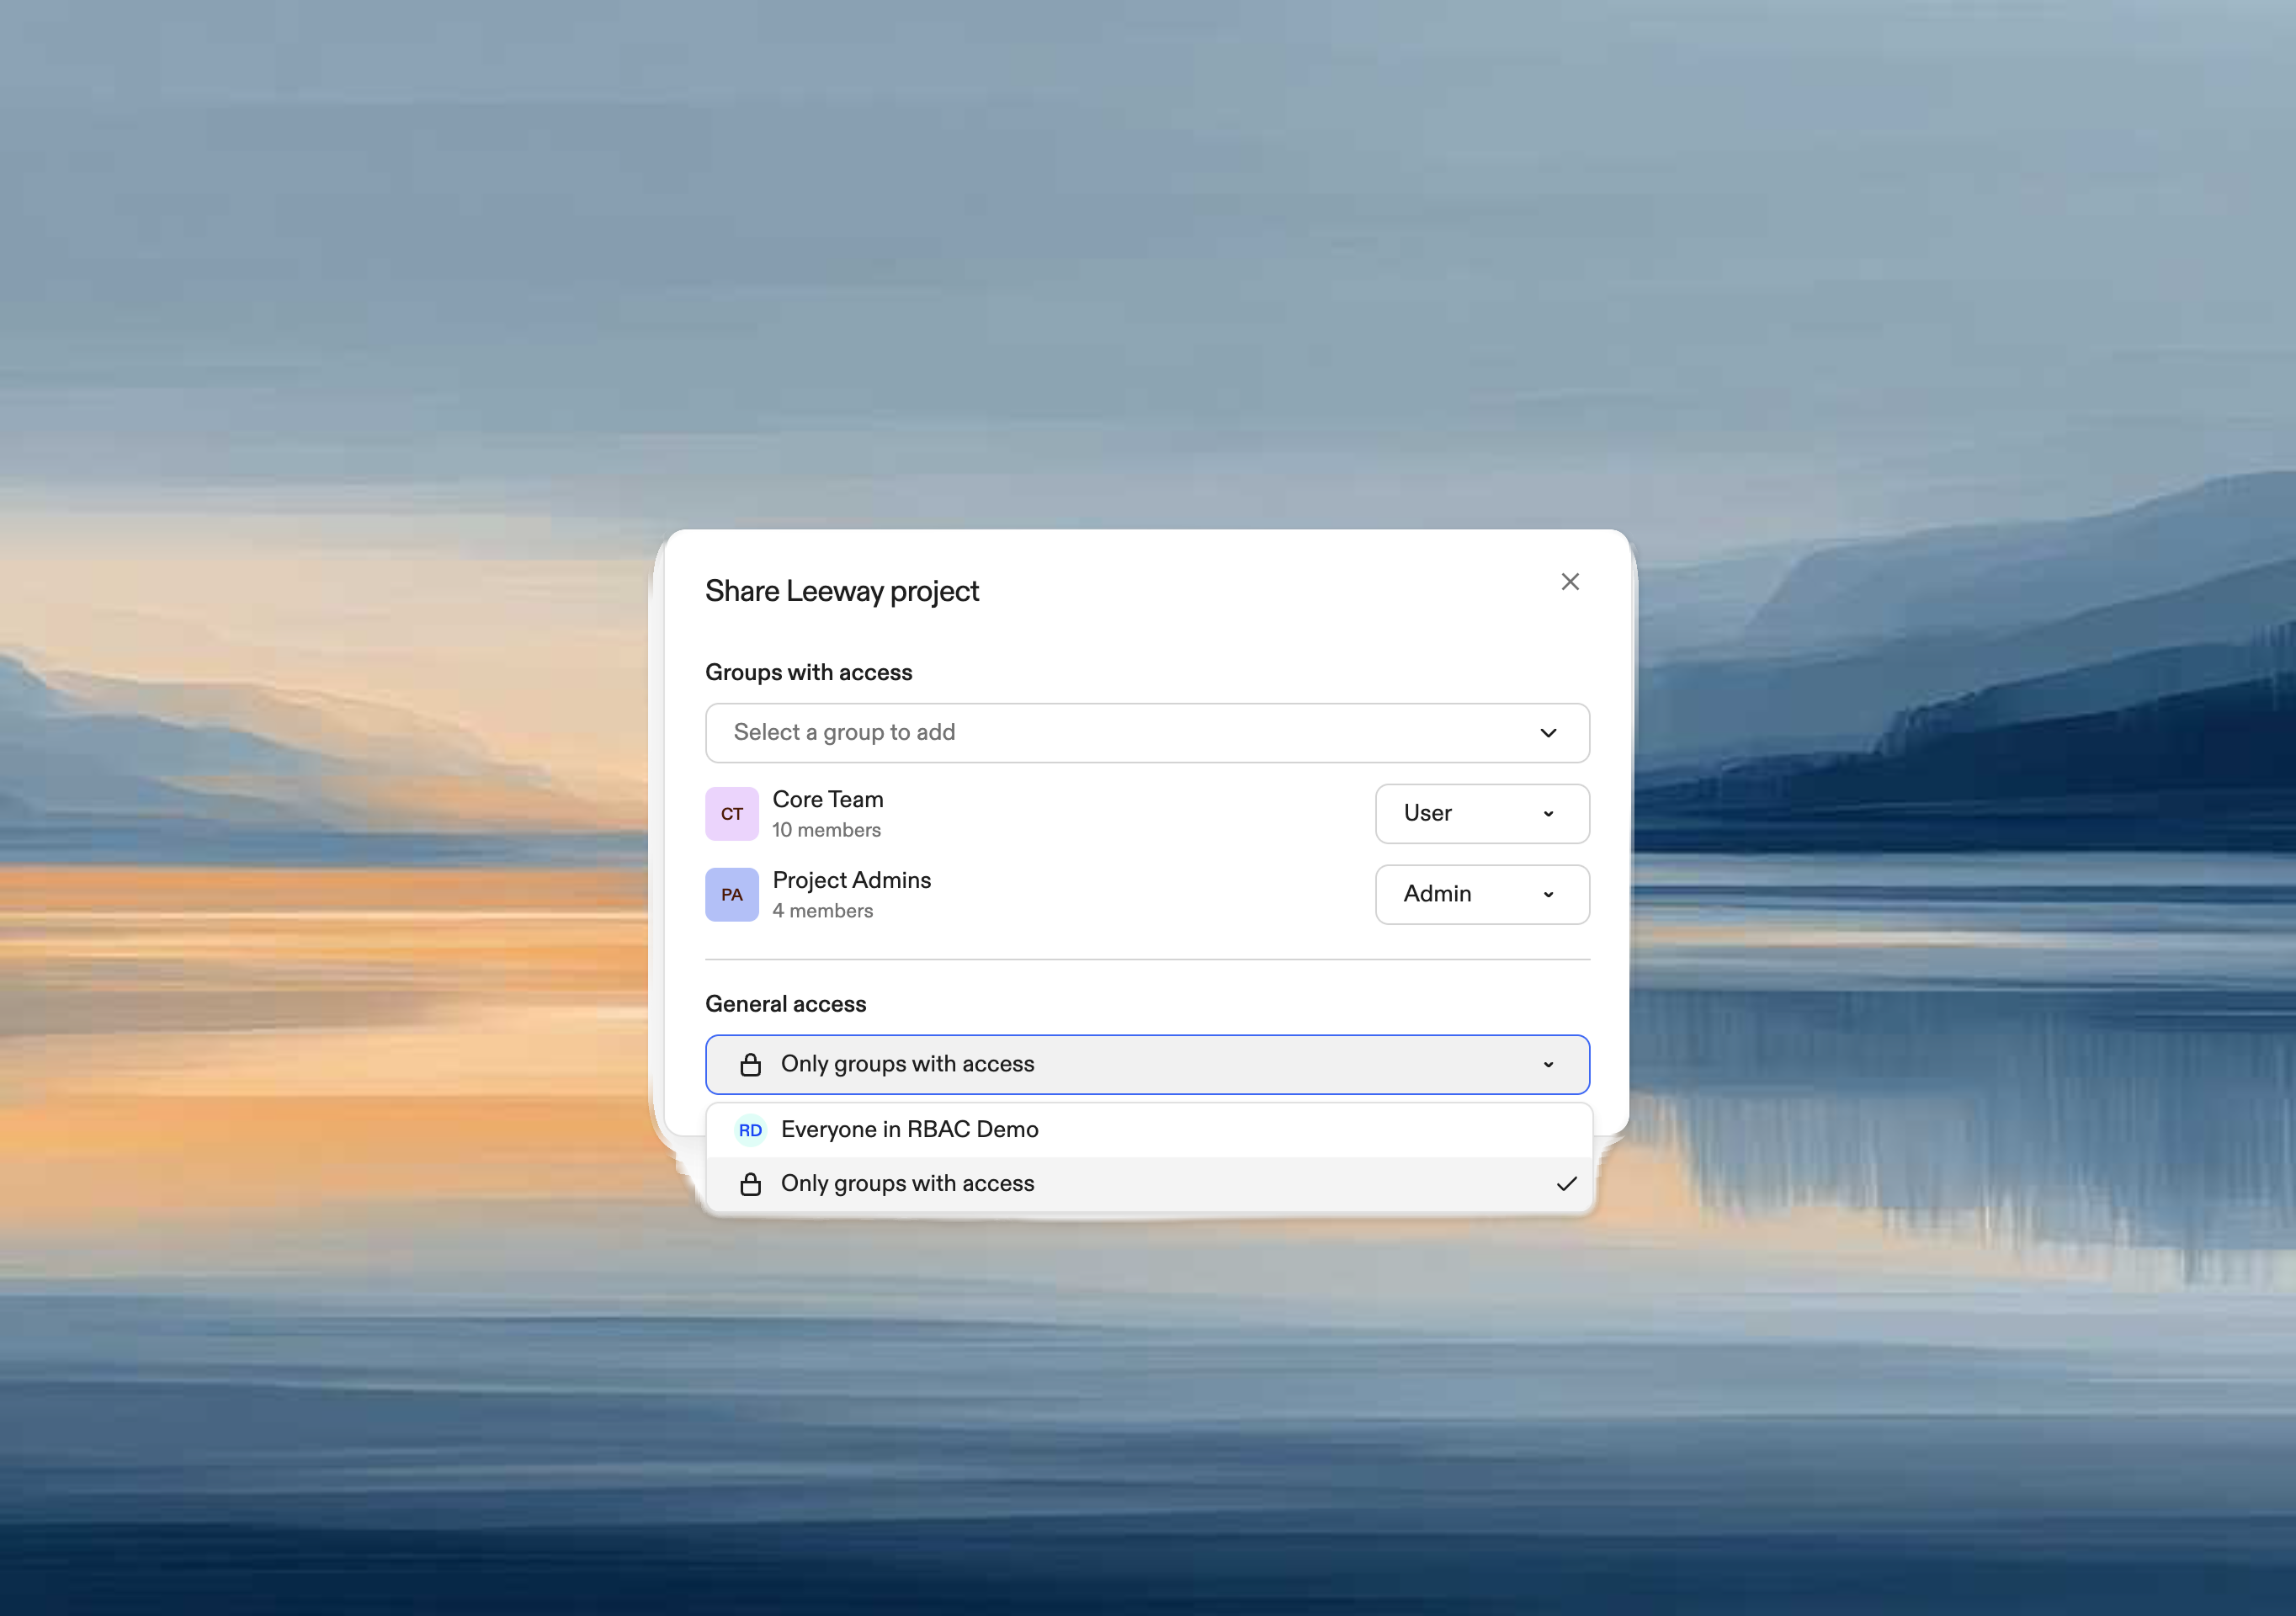
Project admins can share their projects with other users and groups. When you create a project, you automatically become its admin.- Open the project and click Share
- Click Add users or groups
- Select individual users or groups to add
- Choose a permission level for each:

Change permissions
- In the Share dialog, find the user or group
- Click the role dropdown
- Select a new permission level (takes effect immediately)

Remove access
- Click the role dropdown next to the user or group
- Select Remove access
Organization-wide access
To share with everyone in your organization:- In General access, select your organization name
- All members get User access; you can still grant elevated permissions to specific users or groups
- In General access, select Only people with access
Share a runner
Runner admins can share their runners with other users and groups.- Go to Settings → Runners
- Click ⋯ → Share runner
- Add users or groups and assign roles (same dialog as projects)

Access dependencies
Projects use runners through environment classes. If a user has project access but no access to any of its runners, they can see the project but cannot create environments.Share dialog warnings
The Share dialog displays warnings to prevent access issues: When sharing a project:“These users will not be able to use the project unless the underlying runner is also shared with them.”When restricting runner access:
“Removing access to this runner may prevent these users from using projects that depend on it.”