

What a run contains
- Run: the top-level execution record
- Actions: per-target executions created under that run
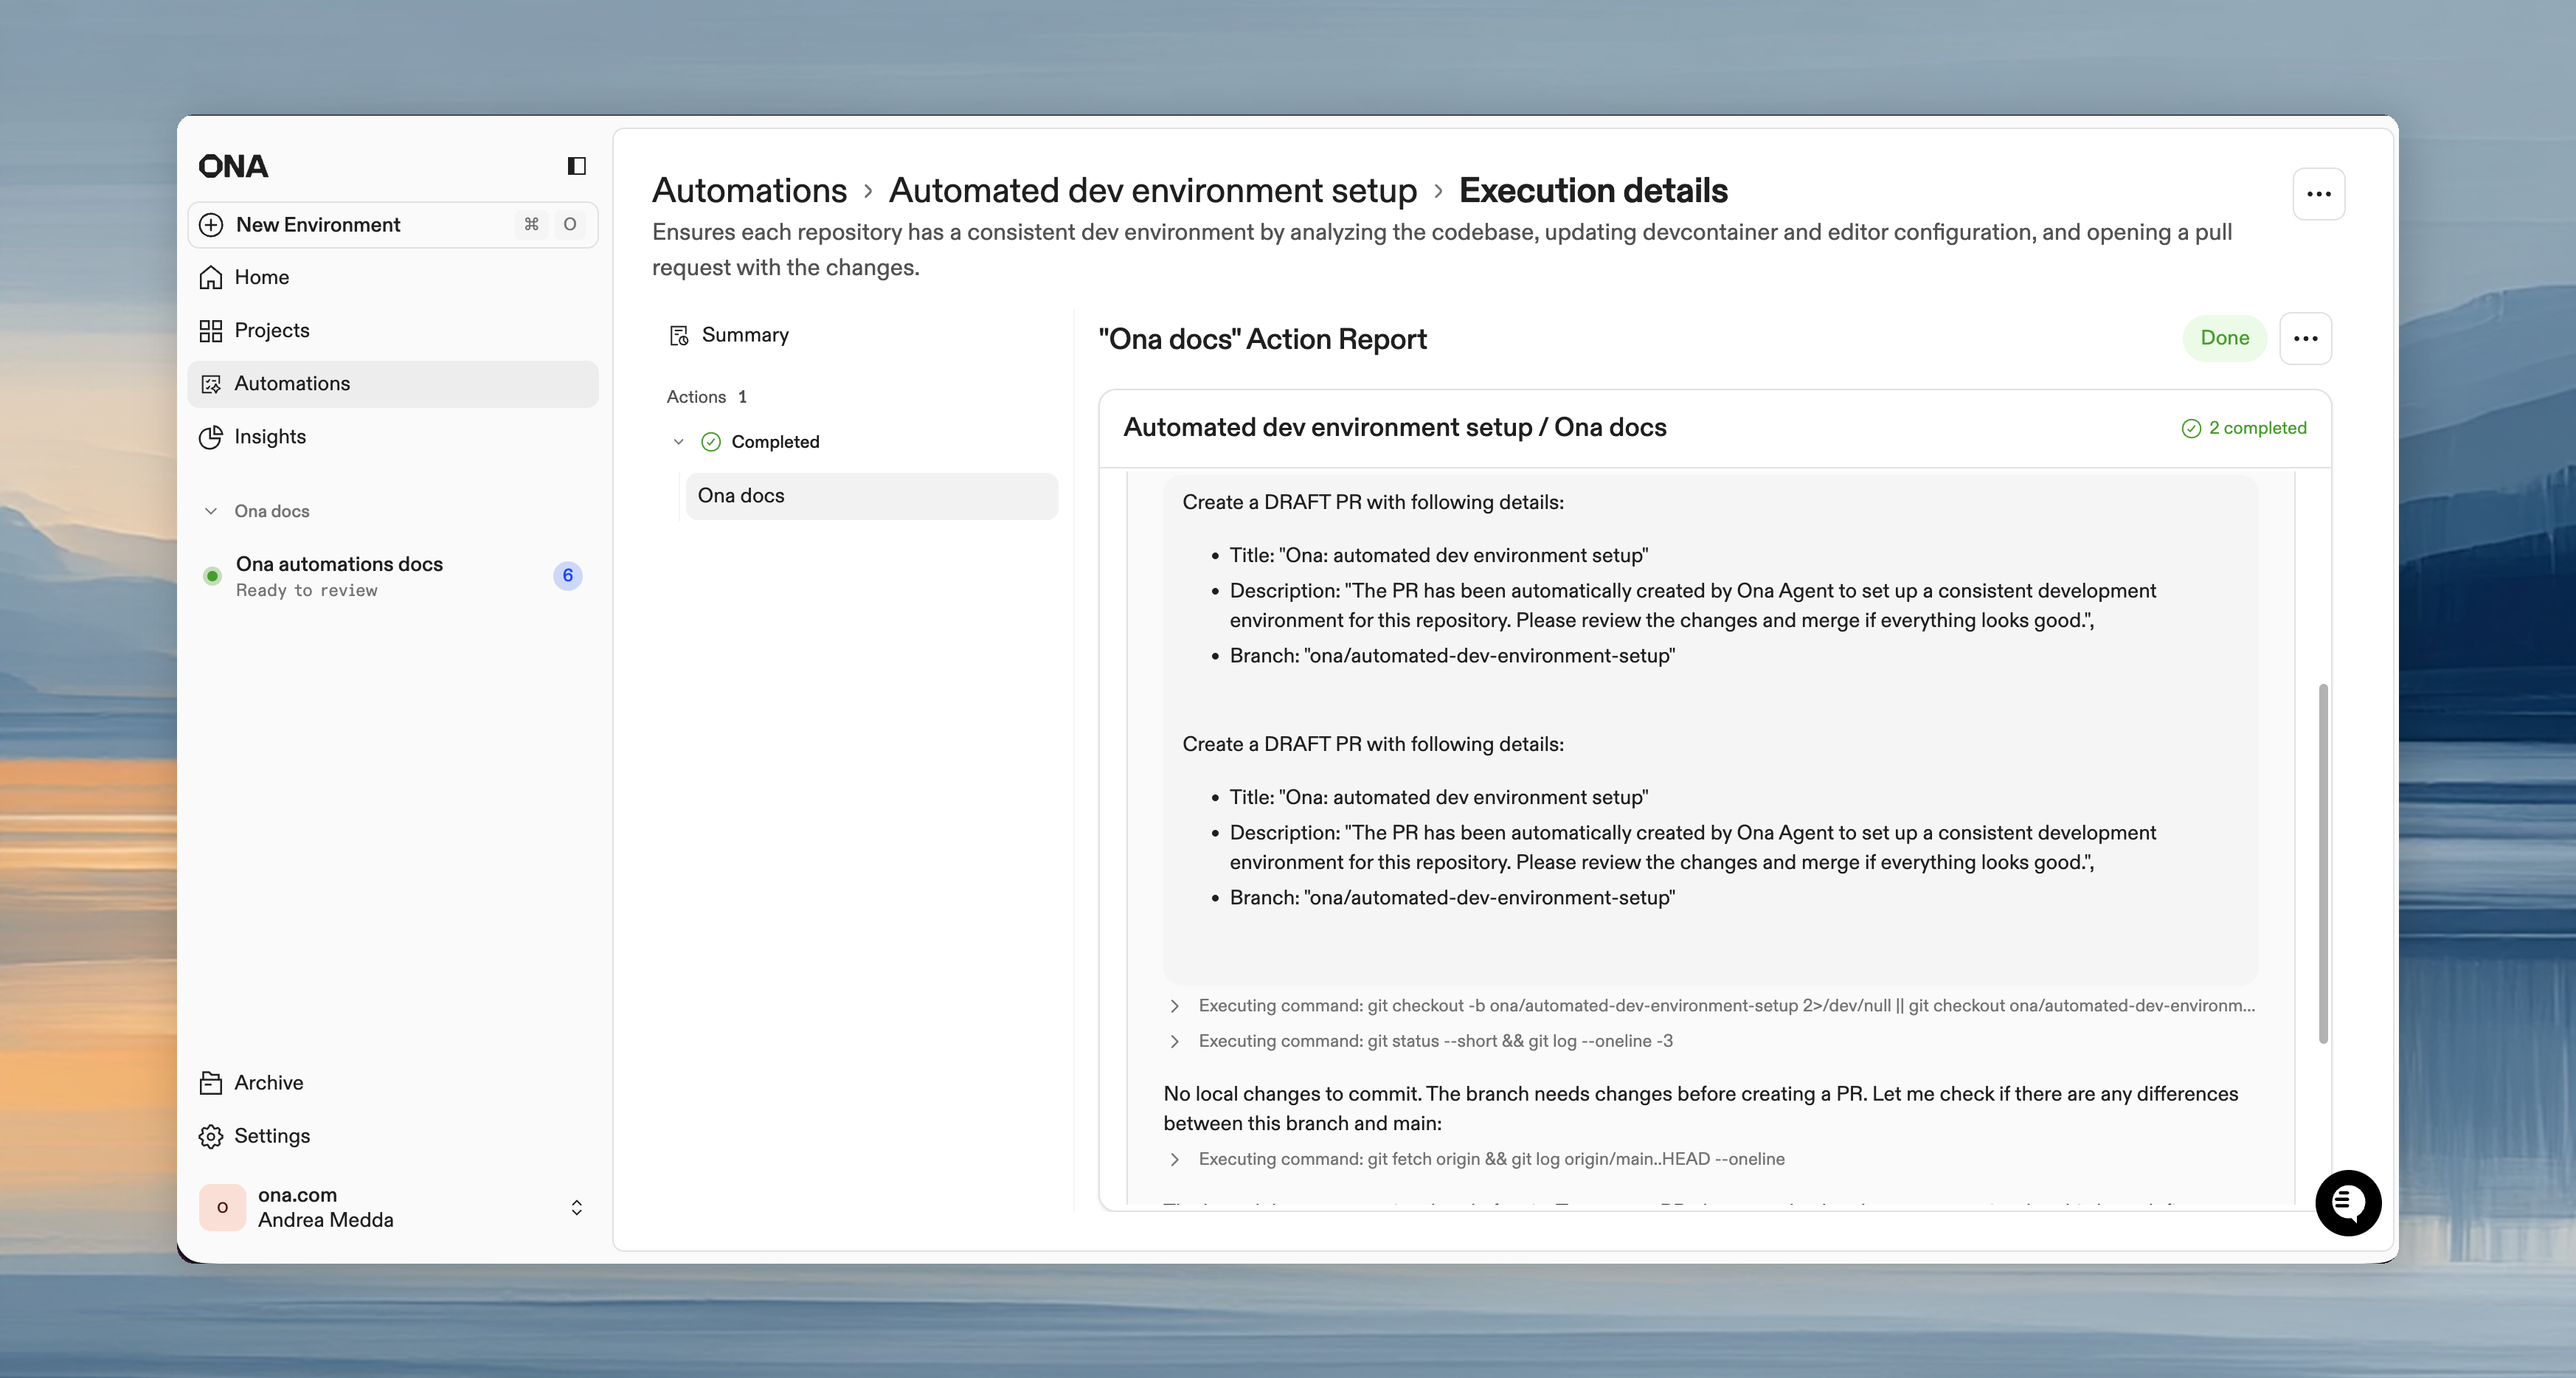
- Execution details: action status, step progress, failures, and, when available, the full agent session for an action
Start an Automation
Disabled Automations cannot be started. The Run button is hidden and triggers are ignored while an Automation is disabled. Re-enable it first.
- Open the Automation (or use the three-dot menu from the list).
- Click Run.
- Confirm target repositories/projects.

Monitor progress
The run details page shows real-time execution status. Action statuses:- Pending: queued, waiting to start
- Running: currently executing
- Done: finished successfully
- Failed: finished with errors
- Stopped: canceled before completion
What to look for while monitoring
When a run is active, focus on:- whether actions are starting as expected
- which step a failed action stopped on
- whether failures are isolated to one target or systemic across many targets
Cancel execution
- Single action: three-dot menu > Cancel
- Entire run: click Cancel on the run details page
Review results
After completion:- View execution summary (completed/failed/canceled actions, time)
- Click individual actions to review execution details
- Check your SCM for pull requests created by the Automation
Execution history
View past runs from the Automation’s Execution History section. Each run retains action status and execution details for later inspection. Use history to compare configuration changes over time or to confirm whether a failure started after a workflow, secret, or trigger change.Common follow-ups
After reviewing a run, the next step is usually one of:- update the Automation configuration and run it again
- fix repository setup or secrets for the failing target
- tighten guardrails or switch to a service account
- move from manual testing to a time-based or pull request trigger