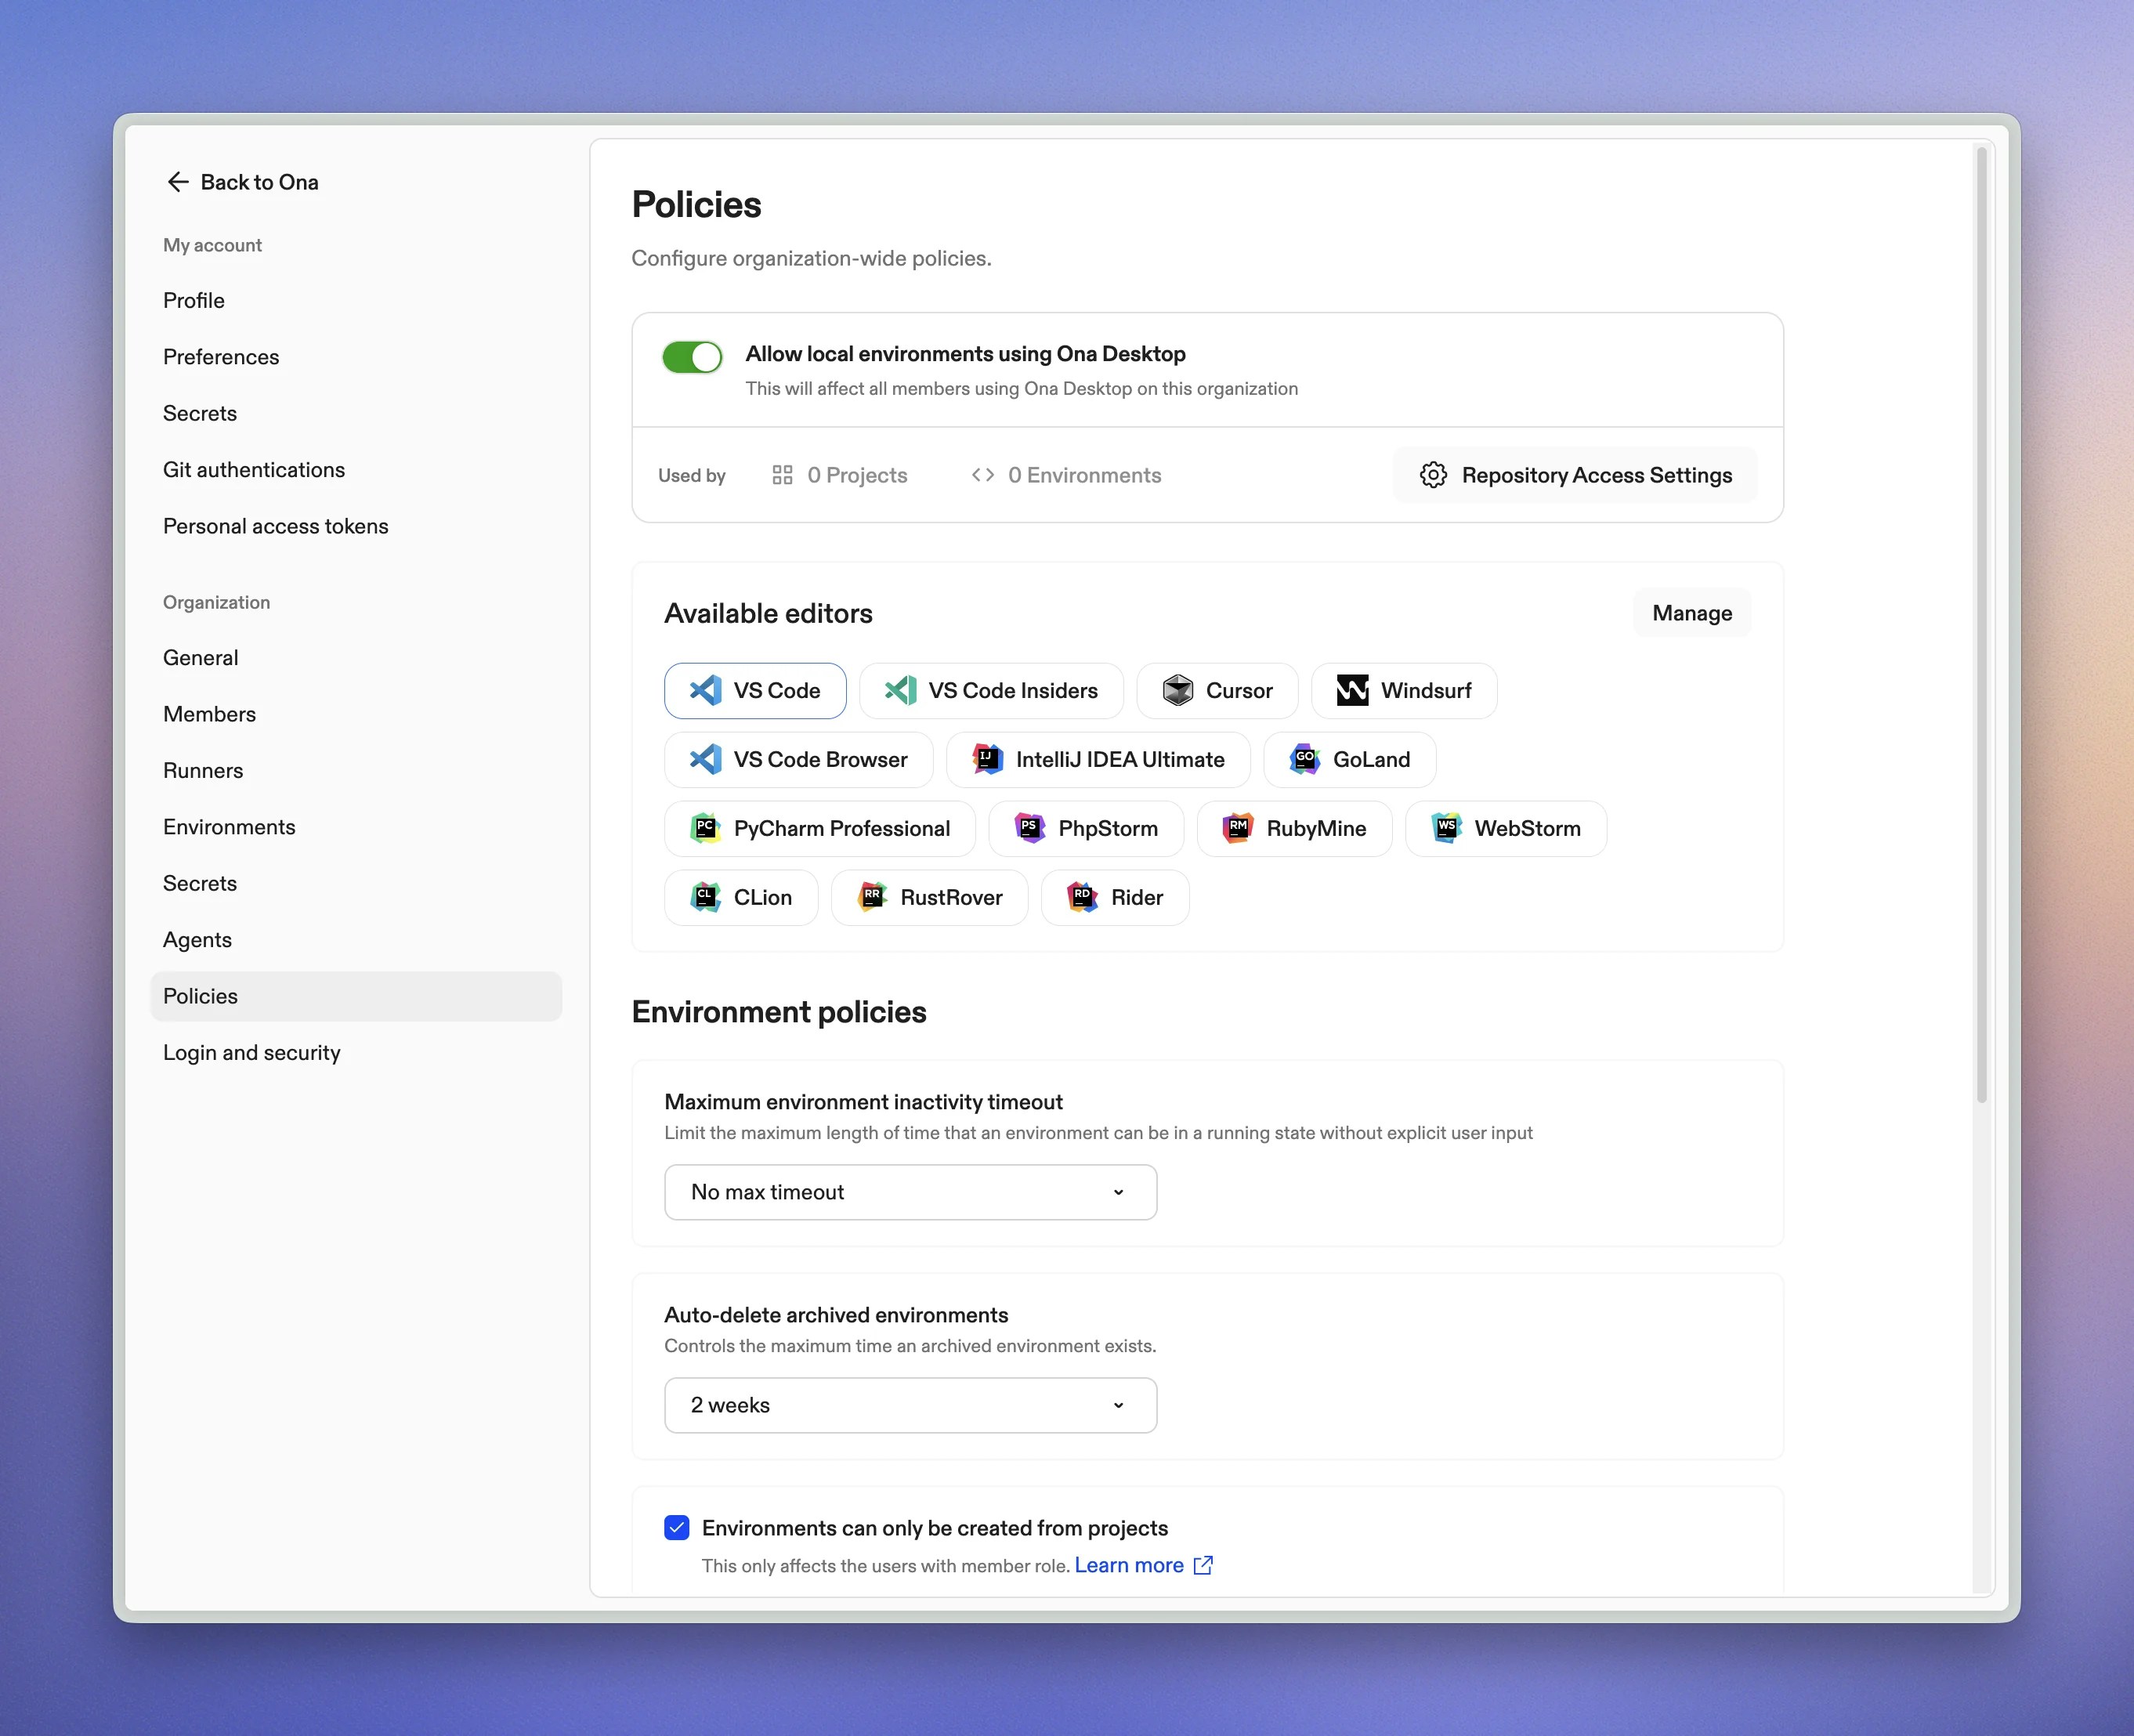
Organization policies are only available on Core and Enterprise plans. Free tier organizations will not have access to these features.
What are Organization Policies?
Organization policies give administrators control over how Ona is used within their organization. With these policies, you can:- Set limits on resource usage to control costs
- Enforce consistent development environments
- Implement security restrictions
- Streamline the user experience for your team
Getting Started with Policies
Where to Find Policies
- Ensure you have selected your organization
- Navigate to Settings > Organization > Policies

Who Can Access Policies?
Only organization administrators can view and modify policies. Regular members do not have access to organization policies.How Policies Work
- Most policies apply to all organization members
- Changes take effect immediately for new actions
- Existing environments are not affected by policy changes
- Administrators can override certain policies (like environment creation restrictions)
Available Policies
Editor Restrictions
This policy lets you standardize which code editors your team can use, creating consistency across development environments, enforcing company standards, and simplifying onboarding with standardized tools. You can also set a default editor that will be pre-selected for all users. Configuration- In your Organization Policies page, click on
Manage Editors
button - Select the editors you want to allow from the list
- Choose a default editor that will be pre-selected for users
- Save your changes
Remember: You must keep at least one editor selected.

- Users will only see the allowed editors in the editor selection dropdown
- The default editor you selected will be pre-selected automatically
- Attempts to use a non-allowed editor (for example: via CLI) will be met with an error indicating the reason
Maximum Environment Timeout
Limit the auto-stop timeout options that users can select for their environments to prevent unnecessary resource usage and control computing costs. Configuration- In your Organization Policies page, click on dropdown under
Maximum timeout duration
option - Choose from the following available maximum values:
- 30 minutes
- 1 hour
- 3 hours
- 8 hours
- No Max Timeout (all options available, including
Never
Timeout)

- Users will only see timeout options up to the maximum allowed by your policy in the dropdown menu
For example, if you select “3 hours” as the maximum timeout, users will only see these options when starting an environment:
- 30 minutes
- 1 hour
- 3 hours
- If you select “No maximum,” users will see all timeout options including “Never.”

Environment Creation Restrictions
Note: This policy only affects organization members and not organization admins.This policy controls whether regular organization members can create environments directly from repository URLs or if they are restricted to only creating environments from pre-defined projects. This policy ensures that regular members work only within approved projects that administrators have set up, maintaining organizational control over which repositories are used for development. Configuration
- Go to your Organization Policies page
- Check “Environments can only be created from projects” option under
Environment creation restrictions
to enable this restriction

-
Organization Members:
- Can only create environments within existing projects
- Will see “Create Environment” button restricted to existing projects only
- Cannot create new projects
- Will receive a policy notification when attempting to use repository URLs directly
-
Organization Administrators:
- Can create environments from any source, including direct repository URLs
- Have exclusive permission to create new projects
- Retain full access to all environment creation features
Port Sharing Restrictions
This policy controls whether organization members can share ports from their environments to make services publicly accessible on the internet. If enforced, this restriction prevents users from exposing any ports from their Ona environments. This policy helps you:- Maintain security by preventing unauthorized exposure of development services
- Ensure compliance with organizational security policies
- Prevent accidental exposure of sensitive applications or data
- Control network access patterns within your organization
- Go to your Organization Policies page
- Check “Disable port sharing” option under
Port sharing restrictions
to prevent users from sharing ports

- Users will not be able to share ports using either the UI or CLI methods
- Attempts to use
gitpod environment port open
CLI commands will be blocked with a policy restriction message - Users will not be able to use VS Code Browser
- Users will see a notification explaining that port sharing is disabled by organization policy
Maximum Concurrent and total environments a user can have
This policy helps administrators manage resource usage and control costs by setting two important limits:- Maximum total environments per user: Limits how many total environments (running or stopped) each user can have
- Maximum running environments per user: Limits how many environments each user can have running simultaneously
- Prevent resource overuse that might impact your organization’s infrastructure
- Control cloud computing costs, especially with AWS EC2 runners
- Encourage users to clean up environments they’re no longer using
- Ensure resources are distributed fairly across your team
- Go to your Organization Policies page
- Set appropriate values for both
Maximum concurrent environments
andMaximum total environments
- Both values must be between 1 and 100
- These are set to 10 and 50 respectively by default

- A notification will appear when they attempt to create a new remote environment beyond the limit
- The notification will explain the policy limit and suggest stopping unused environments
Warning: If you are using EC2 runners, note that undeleted environments (running or stopped) will incur usage costs as per AWS pricing.

Default Environment Image
This setting controls the default devcontainer configuration that Ona automatically generates when users open repositories without existing devcontainer configurations, or when starting blank environments. Administrators can customize this organization-wide template to:- Provide a standard starting point for new environments
- Replace Ona’s system defaults with organization-specific standards
- Ensure consistency across your organization
- If your runner network limits public Internet access, you will be able to start configuring devcontainer with images available in your network
- Go to your Organization Policies page
- Enter a valid container image reference under
Default environment image
option (for example:mcr.microsoft.com/devcontainers/base:ubuntu-24.04
)
mcr.microsoft.com/devcontainers/base:ubuntu-24.04
) will be used.
Using private images? Make sure to set up proper access for your container registry.

- The configured image will be used automatically when repositories don’t specify an image
- Users won’t need to take any additional action
Auto-delete Archived Environments
Set the maximum retention period for archived environments across your organization.- Environments archive after 7 days inactive (fixed)
- This policy sets when they’re auto-deleted
- Overrides user preferences when more restrictive

- Go to your Organization Policies page
- Under “Auto-delete rules”, select the maximum retention period from the dropdown:
- 1 week: Delete 7 days after archiving
- 2 weeks: Delete 14 days after archiving
- 4 weeks: Delete 28 days after archiving
- Never: Keep archived environments indefinitely
Tracking Policy Changes
All policy changes are automatically recorded in your organization’s audit logs. This gives you:- A complete history of who changed which policies and when
- Records of any policy violation attempts
- Visibility into how policies are being enforced
Best Practices for Managing Policies
Start Gradually
- Begin with moderate limits and adjust based on actual usage
- Inform your team before implementing new restrictions
- Use audit logs to see how policies affect workflow
Optimize Resource Management
- Set limits appropriate for your team size and available resources
- Regularly review usage patterns and adjust as needed
- Consider creating a policy review schedule (quarterly or after significant team changes)
Balance Security and Productivity
- Choose editor restrictions that align with security requirements without hampering productivity
- Use project-based environment creation to maintain organization without excessive restrictions
Common Questions
What happens to existing environments when I change a policy?
Existing environments aren’t affected by policy changes. The new rules only apply to new environments or actions.Will users lose work when hitting a policy limit?
No. When users reach a policy limit (like maximum concurrent environments), they’ll see a message explaining the limit and suggesting actions they can take, such as stopping unused environments.Can I set different policies for different teams?
Currently, policies apply to the entire organization. Team-specific policies aren’t available yet.Do administrators have to follow these policies too?
Some policies, like environment creation restrictions, don’t apply to administrators. Others, like resource limits, apply to everyone.How can I make a temporary exception to a policy?
The policy system doesn’t include built-in exceptions. To make a temporary exception, adjust the policy temporarily and then change it back when no longer needed.What happens if I downgrade from Pro/Enterprise to Free tier?
If you downgrade to the Free tier, your policy settings will be preserved but will become inactive and non-editable until you upgrade again.Can policies be enforced retroactively?
Most policies only affect new actions or environments. Existing environments will continue to operate under the settings they were created with.Getting Help
If you have questions about organization policies:- Contact us using the chat widget in the app (CORE tier and above.)
- Enterprise customers: Reach out to your account representative