

Available on the Enterprise plan. Contact sales to learn more.
- Multiple email domains per login provider: Configure several email domains for a single identity provider, for organizations with multiple subsidiaries or acquired companies.
- Multiple login providers per organization: Set up more than one identity provider (e.g., both Okta and Azure AD) to accommodate different teams or authentication requirements.
- Cross-organization domain support: Use the same email domain across different organizations. Users are presented with a list of login options to select their organization.
Prerequisites
- Admin-level access to your organization settings.
- Domain/DNS admin privileges to add a DNS TXT record. Ona uses this record to verify ownership of the domain associated with your organization.
- An Identity Provider (e.g., Google, GitLab, Okta, Microsoft Entra ID) that supports OpenID Connect (OIDC). You need to create an OIDC application with your IdP and obtain the Client ID, Client Secret, and Issuer URL.
Setting up Single Sign-On
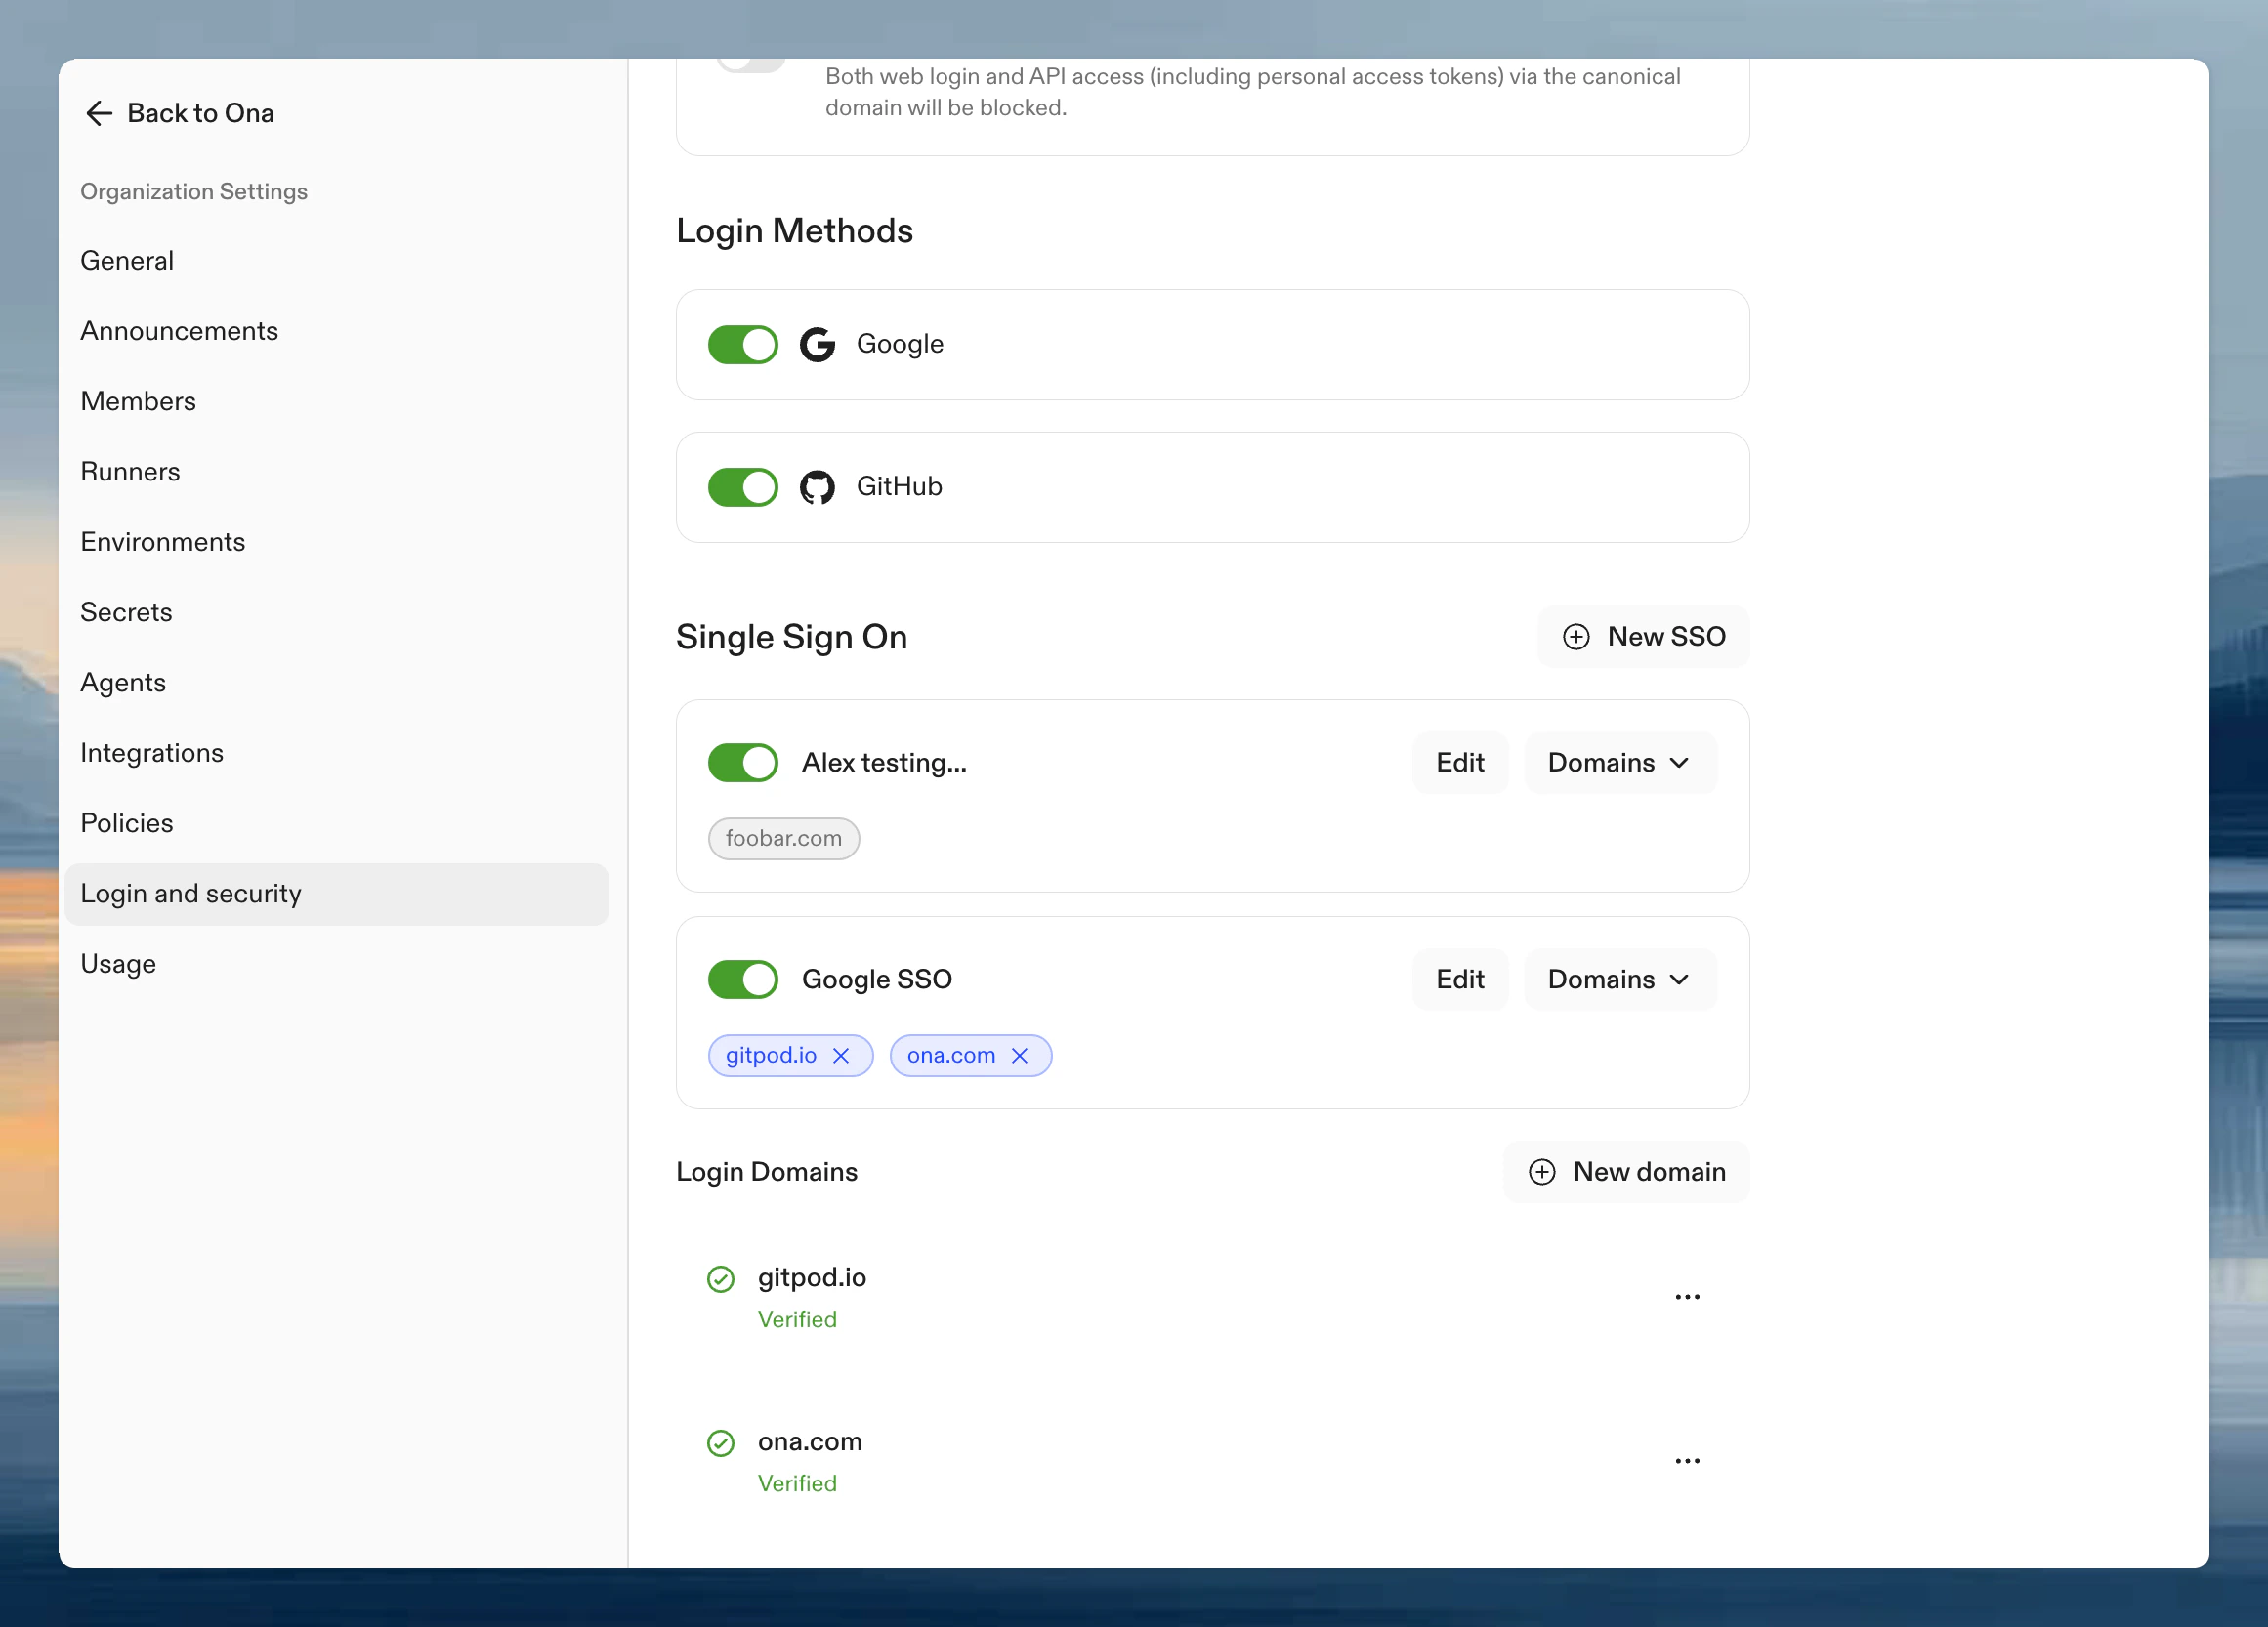
Navigate to Settings > Login & Identity > Login Configuration. SSO setup involves three components that can be configured in any order:- Login providers - Configure connections to your Identity Providers
- Domains - Verify ownership of your email domains
- Domain associations - Link verified domains to login providers
Step 1. Create a login provider
Click New SSO to configure how Ona connects with your Identity Provider. Enter a display name for your login provider. This name appears on the login provider card in your settings and on the login selection screen when users sign in. Provider-specific setup guides: After following the guide for your provider, complete the form with:- Client ID: The identifier for your OIDC application.
- Client Secret: Secret key for authenticating with the IdP.
- Issuer URL: Endpoint of the OIDC server.
Testing your configuration
Test the OIDC application by clicking Test & Continue. The authentication flow with your Identity Provider opens in a new browser window. Verify the authentication flow works before inviting your team to use SSO login.Step 2. Add and verify domains
Domains must be verified before they can be used for SSO login. Verification proves ownership of the email domain. Click New Domain to add a new domain.Verify your domain
Add a TXT record to your domain’s DNS settings. Copy the name and value for the TXT record from the verification view.Check the status of your domain
After adding the TXT record, click Verify to check the status. DNS propagation may take some time. Once the DNS record has propagated, click Verify again to update the status.Your email domain must be verified before the Sign in with SSO option appears on the login screen.
Step 3. Associate domains with login providers
Once you have both a login provider and verified domains, associate the domains with the provider. This tells Ona which identity provider should authenticate users from each email domain. Click on your login provider and select from the dropdown to add a domain. A single domain can be associated with multiple login providers within the same organization. This is useful when different teams using the same email domain need to authenticate through different identity providers.Multiple domains and providers
You can configure multiple verified domains and multiple login providers to support complex organizational structures. Common use cases:- Subsidiaries and acquisitions: Configure domains for each company (e.g.,
acme.com,acme.co.uk,acquired-company.com) under a single login provider. - Different authentication requirements: Set up separate providers for employees (Okta) and contractors (Azure AD).
- Regional teams: Use different identity providers for teams in different regions.
Log in with Single Sign-on
Use your email address
After setting up SSO, log out and return to the login page.- Click Continue with SSO.
- Enter your email address and click Continue. The domain of your email address must match one of the verified domains associated with a login provider.
Selecting your organization or provider
If your email domain is configured in multiple organizations, or if multiple login providers are associated with the same email domain within your organization, a selection screen appears. Choose the appropriate option to proceed with authentication through your selected identity provider.Use the invite link
- Go to Settings > Members > Invite members and copy the invite link for your domain.
- When you open the invite link while not logged in, only the active login providers are shown.
Managing Single Sign-on Access
Only Organization Admins can configure, modify, or disable SSO settings.Deactivating login providers
A deactivated login provider cannot be used to join your organization. Existing login sessions are not affected. To deactivate a login provider:- Go to Settings > Login and Security.
- Click the toggle switch next to the login provider and confirm the action.
Advanced configuration
Additional scopes
By default, Ona requests the standard OIDC scopes (openid, email, profile) when authenticating with your Identity Provider. These scopes provide basic user information such as email address, name, and email verification status.
If you need additional claims from your IdP (such as group memberships, roles, or department information), configure additional scopes on your login provider. These extra scopes tell the IdP to include the corresponding claims in the ID token returned during sign-in.
To configure additional scopes:
- Go to Settings > Login and Security and click on your login provider.
- In the Additional scopes field, enter a comma-separated list of scopes (e.g.,
groups, roles). - Save and test the configuration with Test & Continue.
- Okta:
groupsincludes the user’s group memberships. - Microsoft Entra ID: Configure optional claims in your app registration under Token configuration.
- PingFederate:
groupsor custom scopes defined in your PingFederate configuration.
The IdP decides which claims to include based on the scopes requested and its own configuration. Consult your IdP’s documentation for the available scopes and the claims they return.
Claims expression (CEL)
A claims expression is an optional CEL (Common Expression Language) expression evaluated against the OIDC token claims on every login. When configured, the expression must evaluate totrue for the login to succeed. If it evaluates to false or fails, the user is redirected to the login page with an error message.
The expression has access to a claims variable containing all claims from the ID token as a map. This includes standard claims (email, email_verified, name, sub) and any additional claims made available through additional scopes.
To configure a claims expression:
- Go to Settings > Login and Security and click on your login provider.
- Enter your expression in the Claims expression field.
- Save and test with Test & Continue to verify the expression works as expected.
Examples
Require a verified email address:Example: restricting login to a specific group
A common use case is limiting access to users who belong to a particular group in your Identity Provider. This requires both additional scopes and a claims expression:- Configure the scope: Edit your login provider and add
groupsto the Additional scopes field. This tells the IdP to include group membership claims in the token. - Set the claims expression: Enter an expression like
"engineering" in claims.groupsin the Claims expression field. - Test the configuration: Click Test & Continue. If your account is a member of the
engineeringgroup, the test succeeds. Otherwise, you see a denial message.
Claims expressions have a maximum length of 4096 characters. The expression must evaluate to a boolean value. Non-boolean results are rejected.
Problems and solutions
-
Error: The redirect URI included is not valid.
Make sure the redirect URI in the OIDC application with your Identity Provider matches the Callback URL shown in Ona, e.g.,
https://app.gitpod.io/auth/oidc/callback. -
Error: no such host
Make sure the Issuer URL is correct, e.g.,
https://dev-16686455.okta.com. You can verify the URL by appending/.well-known/openid-configurationand opening it in your browser, e.g.,https://dev-16686455.okta.com/.well-known/openid-configuration.